Lightroom & Photoshop Processing Lesson — “Autumn Aglow”
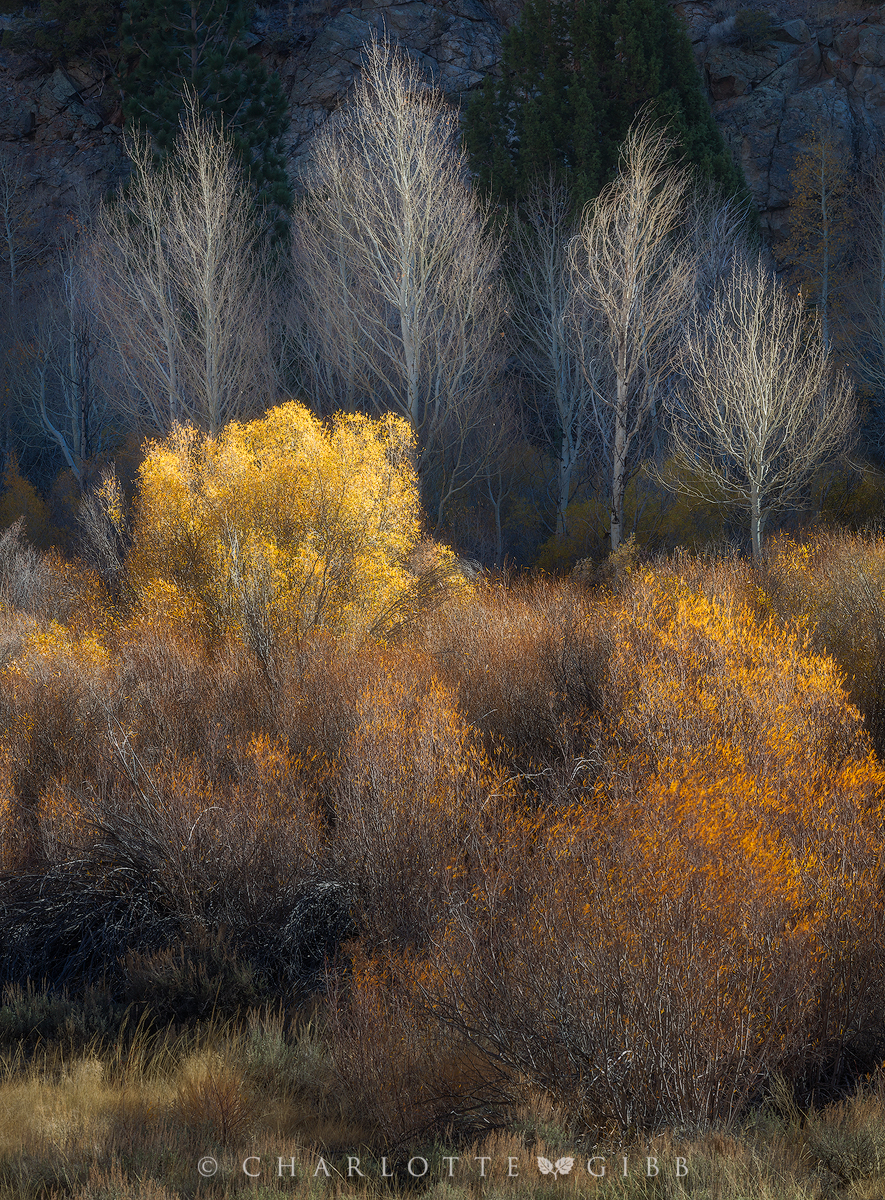
I recently was asked to share some of my processing techniques specific to my image, Autumn Aglow, which I made last Fall in California’s Eastern Sierra. To demonstrate my decision-making process, I’ll walk you through the workflow from my camera technique in the field, to RAW image adjustments in Lightroom, to Photoshop edits and the final image.
In the field
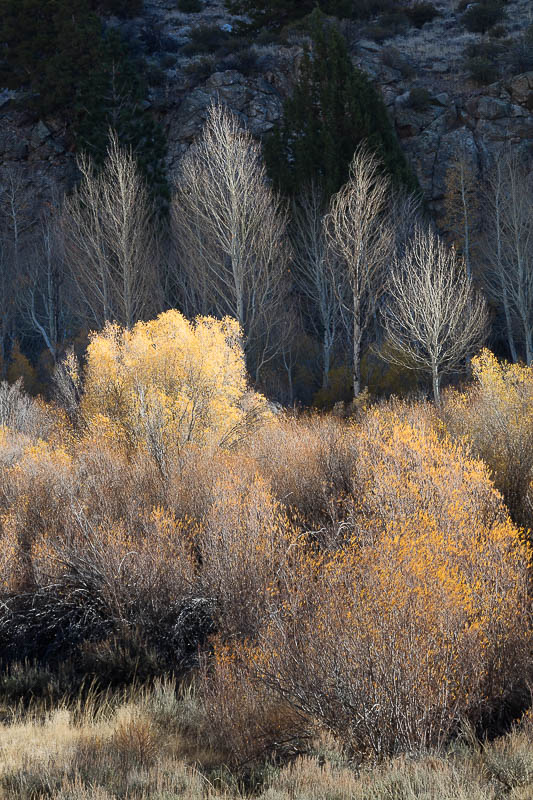
I made this image in the early morning. The light had just crested the ridge, illuminating the grass, foliage and trees in the foreground, but leaving the background hill in shadow. The wind was blowing slightly, and there was still frost clinging to the foliage, creating some specular highlights. I used a polarizing filter to knock those down, and my camera’s native 100 ISO ensured that issues with noise were eliminated. Shooting at 1/20th of second enabled me to freeze most of the movement. However, I liked the slight movement of the very ends of the golden branches in the foreground, so I used my trusty Canon 70-200mm ƒ/2.8L lens, at ƒ/14, 170.0 mm, 1/20 sec, ISO 100. As always, I shot in RAW mode, with white balance set to Auto.
Below is the RAW image straight from the camera, my Canon 5DsR. As you can see, it is slightly over exposed, but not so much that the highlights are unrecoverable.
Workflow — Adobe Lightroom
I use Lightroom to manage my image library, not only to organize and rate my favorite images, but to also to make my first round of edits to the RAW files. I created a Develop Preset that I automatically apply to every image upon import into Lightroom. These settings include decreasing Contrast, recovering Highlights, decreasing the Exposure by 1/2 stop, and bumping Vibrance and Clarity just a tad. Once I weed through the various exposures and compositions and narrow my selection, I make further adjustments to the RAW image being edited. Below is an example of my standard Develop preset.

Here’s how I approached Autumn Aglow. In this case, the highlights needed to be knocked down even more and I wanted to see greater detail in the shadows. This was achieved by reducing contrast and recovering additional highlights with the Highlights slider, then increasing the Shadow recovery slider. I also increased Clarity, which adds local contrast, rather than overall contrast. At this point, I typically use Lightroom’s cloning tool to clean up any sensor dust on the image that may have crept into the camera. The White Balance that my camera automatically selected looked about right to me, so I didn’t change it. (That is not always the case, but I liked the balance between cool and warm tones in this particular image.

Finally, I added a graduated neutral density filter in order to darken the foreground and balance the sunlit foreground with the darker background.

Workflow — Adobe Photoshop
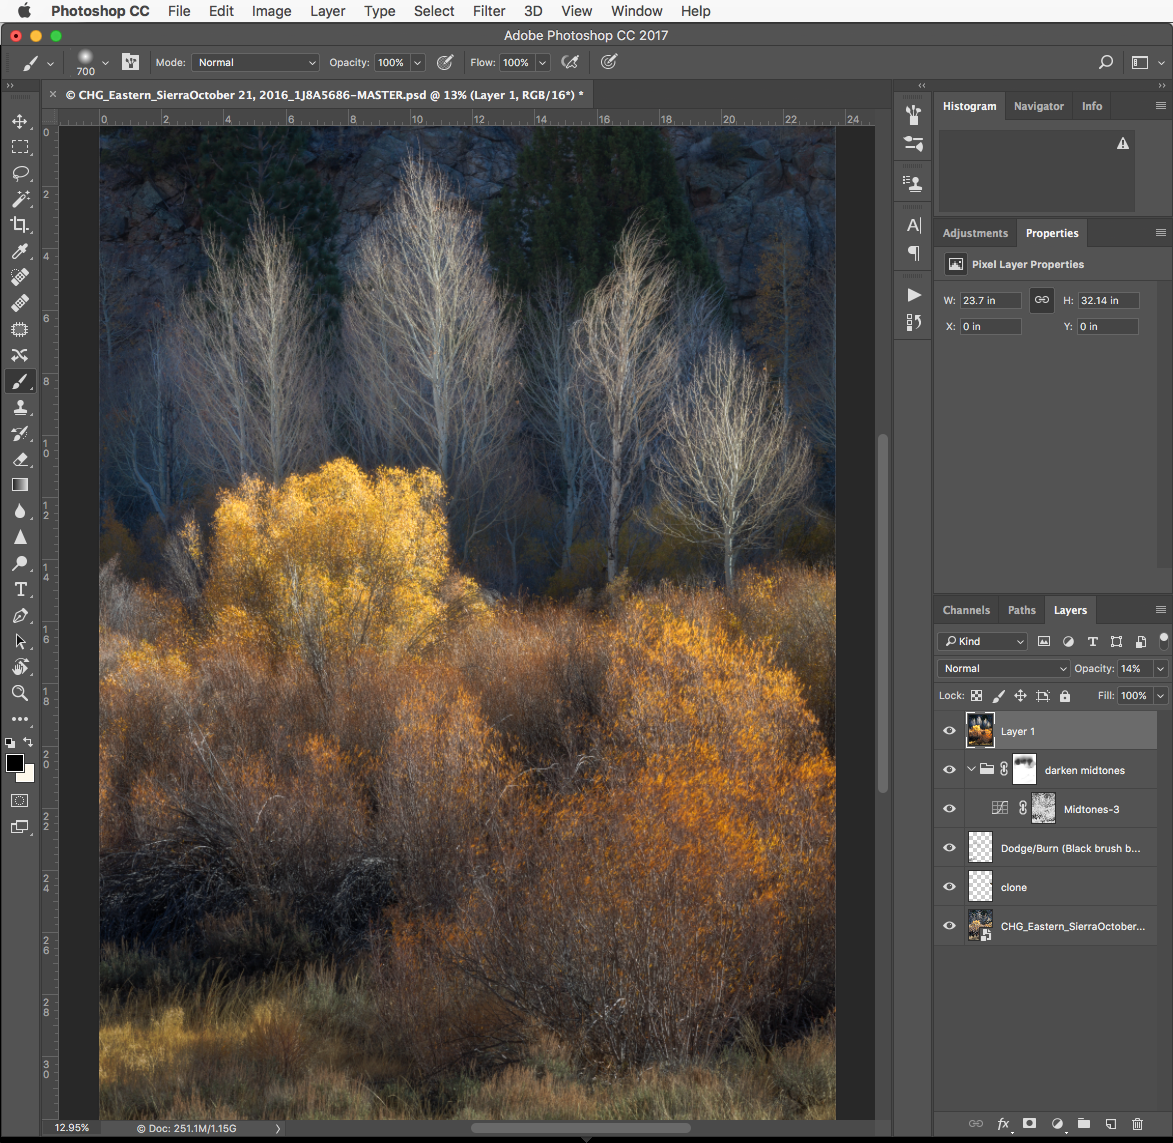
Once satisfied with my RAW adjustments in Lightroom, I opened the image in Adobe Photoshop as a Smart Object (Edit in > Open as Smart Object in Photoshop). That creates a layer in Photoshop with all of the editable RAW data from Lightroom, so if further adjustments need to be made to the RAW file, I can do so in Photoshop without having to go back into Lightroom.
The first adjustment in Photoshop corrected for the leaning trees along the right edge of the background. I used the Distort tool (Edit > Transform > Distort) to straighten the trees by pulling the upper right edge of the frame outward.

Next, a clone layer was added to remove some distracting elements around the edges of the frame.
I found the rocky, shadowy areas in the background to be distracting and wished to tone them down. But, I only wanted to darken the lighter parts of the rocks, not darken the shadows. My solution was to add a Mid Tone layers mask, then group as a layer. Adding a second mask to the grouped layer enabled me to paint in with a brush exactly where I wanted to affect those mid tones.
As a final step, I added a light Orton effect, which gave the image an overall glow. To finish, I cropped a bit off the top of the frame to bring the composition into better balance.
So, there you have it. I use Lightroom for organizing and making initial RAW adjustments, and Photoshop for the heavy lifting such as fine tonal adjustments with custom masks, additional cloning to eliminate distracting elements, and detailed dodging and burning.
It is important to note that, in the field, I do my best to compose in-camera rather than crop later, wasting valuable pixels. This isn’t always possible, but I usually will try several different focal lengths so that I have plenty of raw material with which to work.


18 Comments
Chuck Zabilski
Interesting and informative.
charlottegibb
Thanks, Chuck. Writing about processing is new for me, so I’m glad it made sense to someone!
Jo Boggs
Great blog and excellent instruction for Lightroom. I’m an “enthusiast ” and relatively new to Lightroom so anything you would like to share will be much appreciated. Love your work – makes my heart beat fast!
charlottegibb
I’m delighted that anyone can make use of my instruction. As for the fast-beating heart, that’s the effect I go for! In fact, as I edit my own work, I listen to my own heart to gage emotional response to each image. And if it beats a little faster, then I know I am on to something.
Thomas Fleckenstein
Great work. Thanks for sharing Charlotte. Much appreciated.
charlottegibb
You’re very welcome, Thomas! And I’m glad to hear that you are enjoying my work!
Andy Keeble
Excellent article and a beautiful image! Many thanks for taking the time to write this post Charlotte.
charlottegibb
My pleasure, Andy! Thank you for taking the time to read my article!
Paul
Thanks for the post. Very informative. I love your work.